YOLO Object Detection in PyTorch

Train a custom yolo object detection model in PyTorch
This article is the last of a four-part series on object detection with YOLO.
- YOLO Object Detection Introduction
- YOLO Object Detection with OpenCV
- YOLO Object Detection with keras-yolo3
This article will show you how to use YOLO in PyTorch.
Installation
yolov3 can be installed by cloning the repository and installing the dependencies located inside the requirements.txt file.
git clone https://github.com/ultralytics/yolov3
cd yolov3
pip install -U -r requirements.txt
Detection Using A Pre-Trained Model
You can run an object detection model using the detect.py file. In addition, you can find a list of all the arguments you can parse to detect.py by specifying the --help flag.
usage: detect.py [-h] [--weights WEIGHTS [WEIGHTS ...]] [--source SOURCE]
                 [--img-size IMG_SIZE] [--conf-thres CONF_THRES]
                 [--iou-thres IOU_THRES] [--device DEVICE] [--view-img]
                 [--save-txt] [--save-conf] [--classes CLASSES [CLASSES ...]]
                 [--agnostic-nms] [--augment] [--update] [--project PROJECT]
                 [--name NAME] [--exist-ok]

optional arguments:
  -h, --help            show this help message and exit
  --weights WEIGHTS [WEIGHTS ...]
                        model.pt path(s)
  --source SOURCE       source
  --img-size IMG_SIZE   inference size (pixels)
  --conf-thres CONF_THRES
                        object confidence threshold
  --iou-thres IOU_THRES
                        IOU threshold for NMS
  --device DEVICE       cuda device, i.e. 0 or 0,1,2,3 or cpu
  --view-img            display results
  --save-txt            save results to *.txt
  --save-conf           save confidences in --save-txt labels
  --classes CLASSES [CLASSES ...]
                        filter by class: --class 0, or --class 0 2 3
  --agnostic-nms        class-agnostic NMS
  --augment             augmented inference
  --update              update all models
  --project PROJECT     save results to project/name
  --name NAME           save results to project/name
  --exist-ok            existing project/name ok, do not increment
The source could be an image, video, directory of images, webcam, or an image stream.
- Image: --source file.jpg
- Video: --source file.mp4
- Directory: --source dir/
- Webcam: --source 0
- RTSP stream: --source rtsp://170.93.143.139/rtplive/470011e600ef003a004ee33696235daa
- HTTP stream: --source http://wmccpinetop.axiscam.net/mjpg/video.mjpg
If you don't specify a source, it uses the data/images folder. The results will automatically be saved inside the runs/detect folder.
python detect.py --weights yolov3.pt --img 640 --conf 0.25 --source data/images/
python3 detect.py --weights yolov3.pt --source TownCentreXVID.aviTrain on custom data
1. Create annotations
After collecting your images, you'll have to annotate them. For YOLO, each image should have a corresponding .txt file with a line for each ground truth object in the image that looks like:
<object-class> <x> <y> <width> <height>The .txt file should have the same name as the image. All images should be located inside a folder called images, and all labels should be located inside the labels folder.
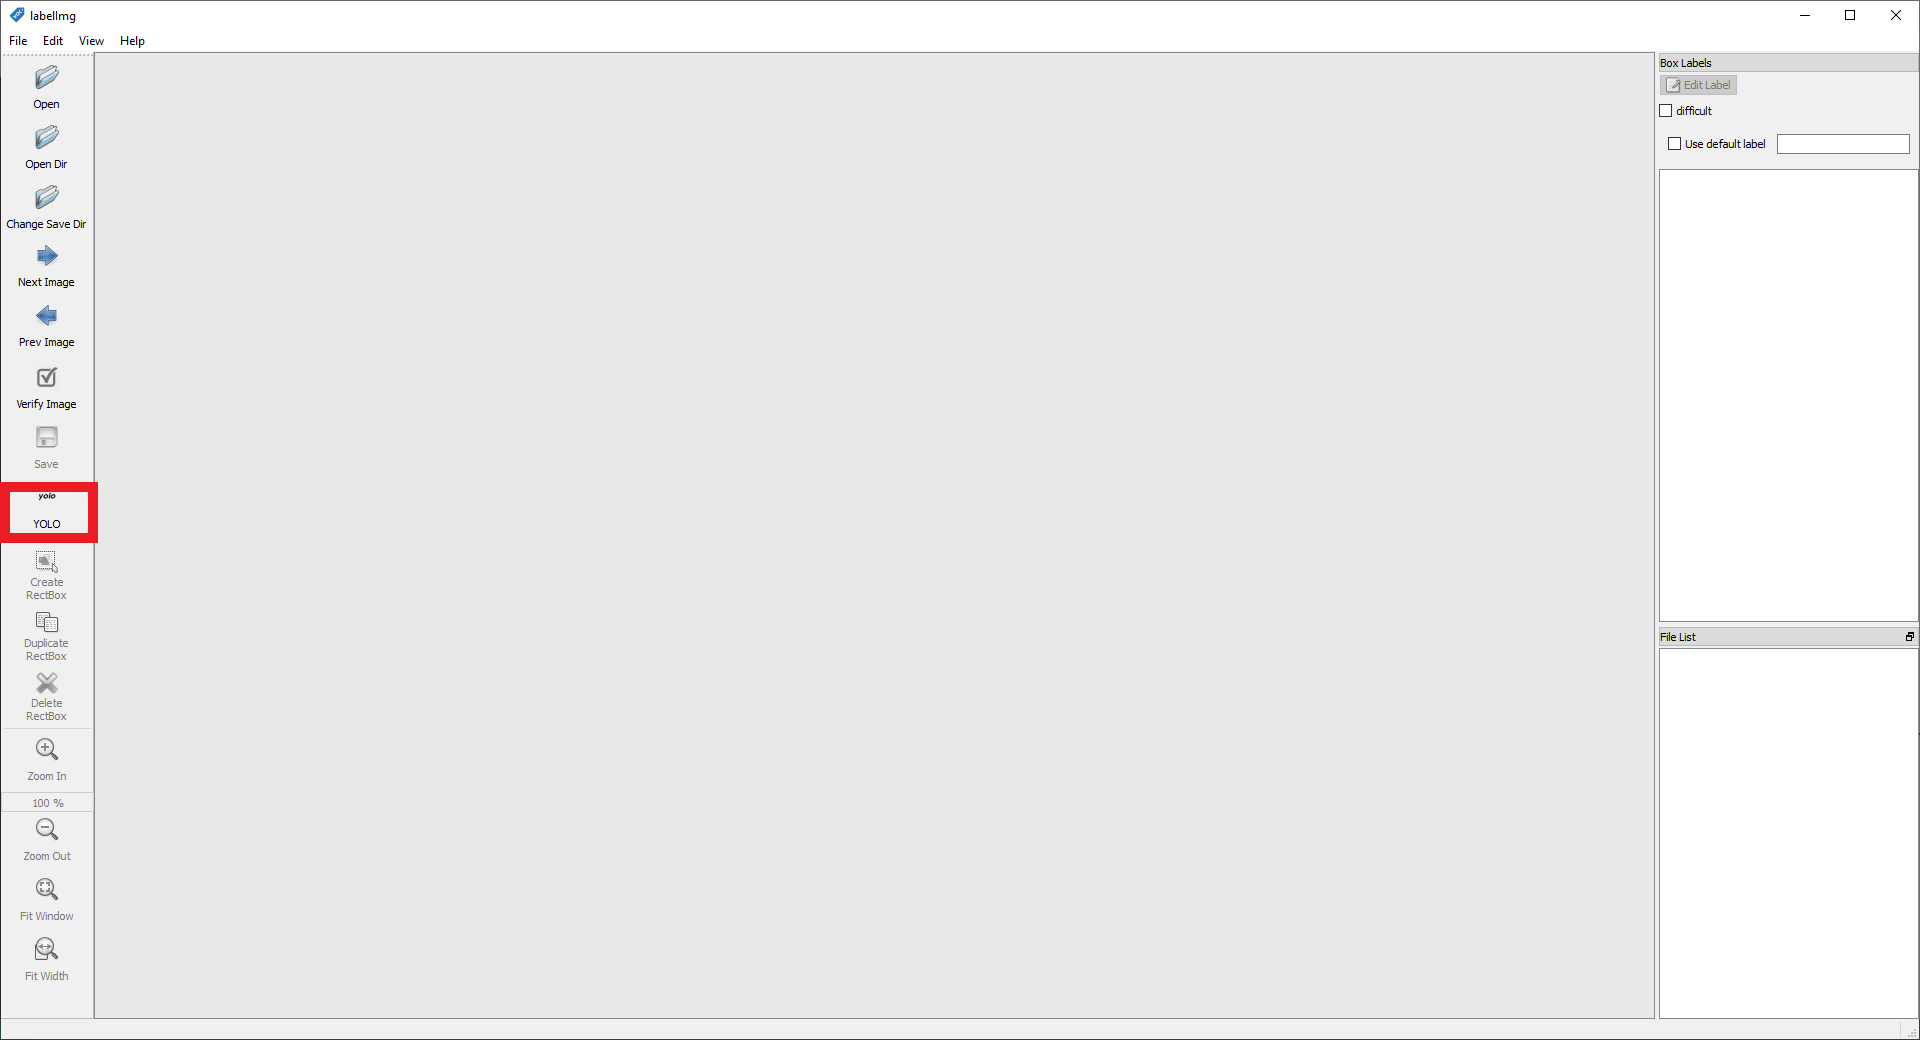
You can get such labels using an annotation tool like labelImg, which supports Pascal VOC and YOLO (ensure you have selected YOLO).
If you have a dataset with PASCAL VOC labels, you can convert them using the convert_voc_to_yolo.py script. Before you execute the file, you'll have to change the classes list to fit your dataset. After that, you can run the script:
python convert_voc_to_yolo.py2. Create a dataset.yaml file
The dataset.yaml file defines 1) an optional download command/URL for auto-downloading, 2) a path to a directory of training images (or path to a *.txt file with a list of training images), 3) the same for our validation images, 4) the number of classes, 5) a list of class names:
microcontroller-detection.yml:
# train and val data as 1) directory: path/images/, 2) file: path/images.txt, or 3) list: [path1/images/, path2/images/]
train: microcontroller-detection/train.txt
val: microcontroller-detection/train.txt

# number of classes
nc: 4

# class names
names: ['Arduino_Nano', 'Heltec_ESP32_Lora', 'ESP8266', 'Raspberry_Pi_3']
3. Start Training
To train the model, pass your yml file to the train.py script. You can also pass additional arguments like the image size, batch size, and epoch count. If you want to start from a pretrained model (recommended), you also need to specify the --weights argument (Pretrained weights are auto-downloaded from the latest YOLOv3 release). If you want to train from scratch (starting with random weights), you can use --weights '' --cfg yolov3.yaml.
python train.py --img 640 --batch 16 --epochs 300 --data microcontroller-detection.yml --weights yolov3.pt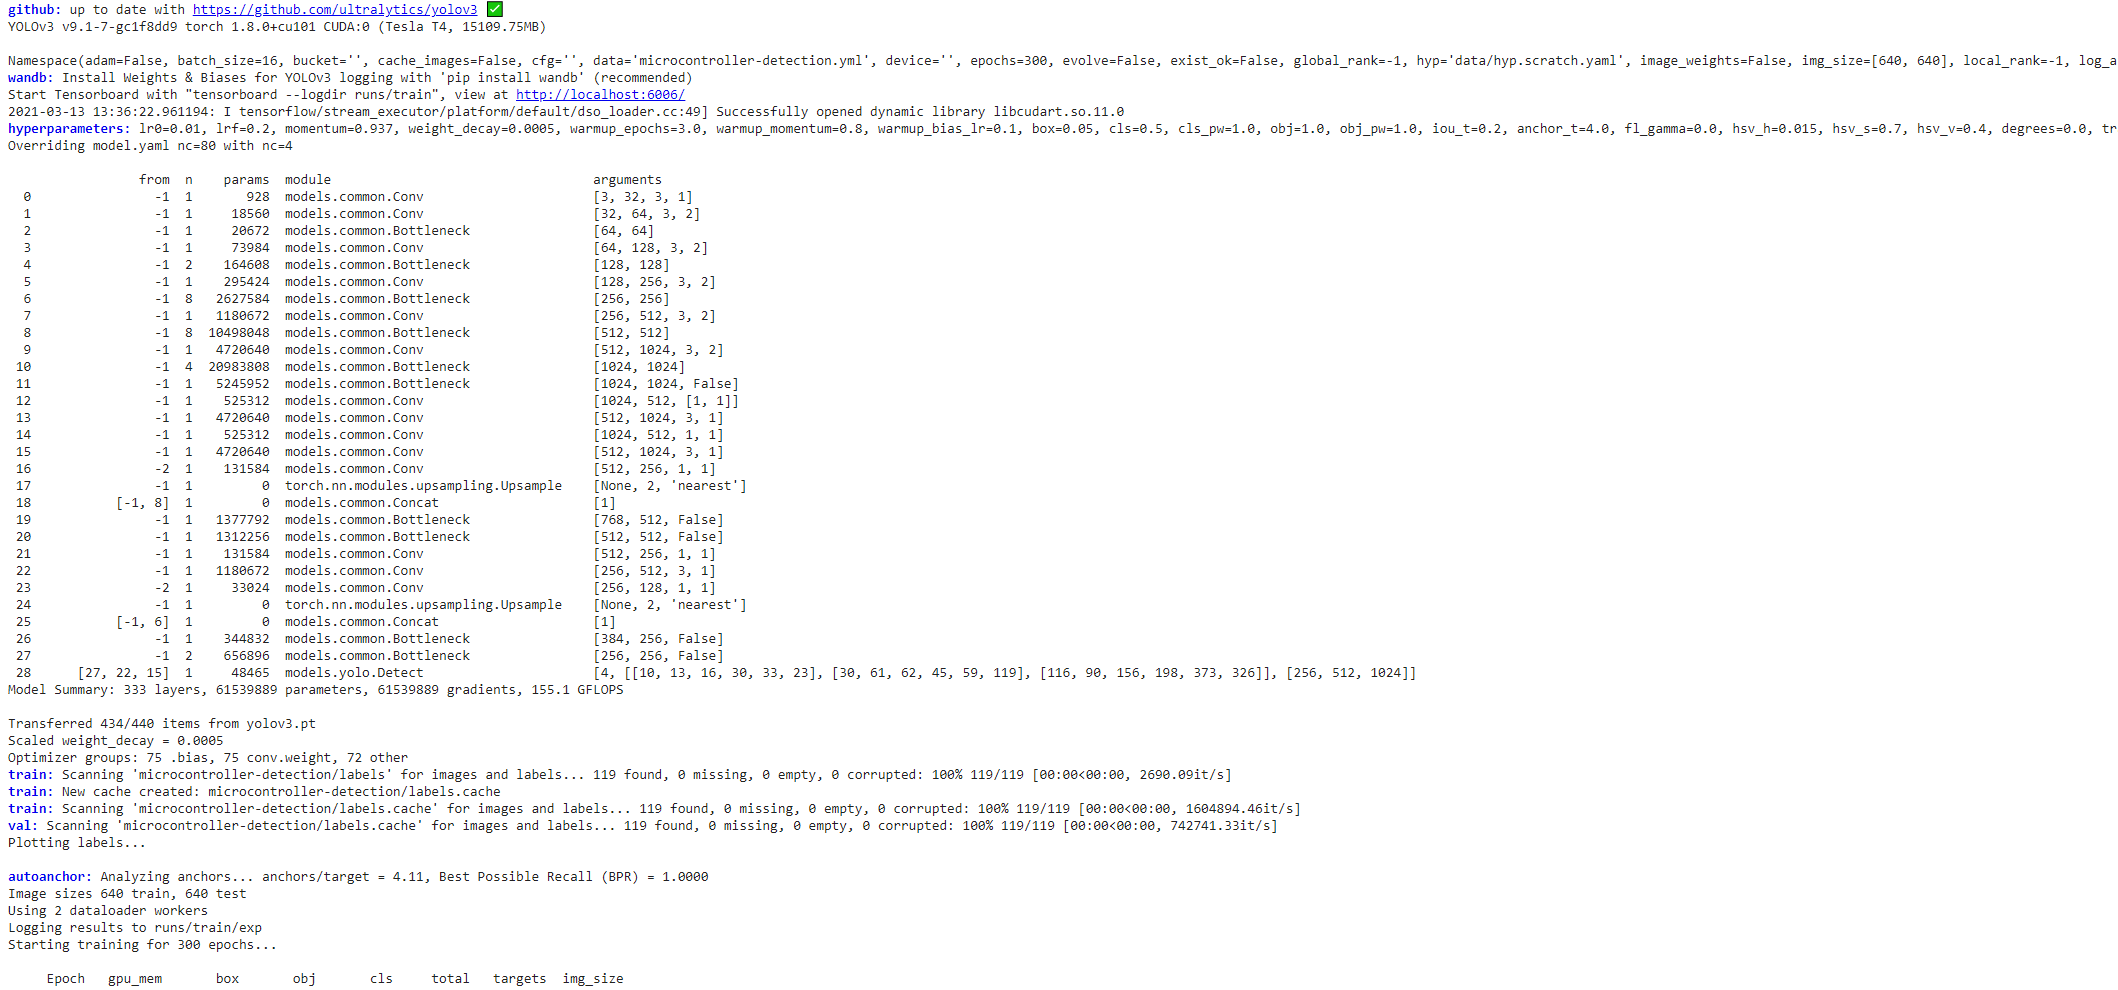
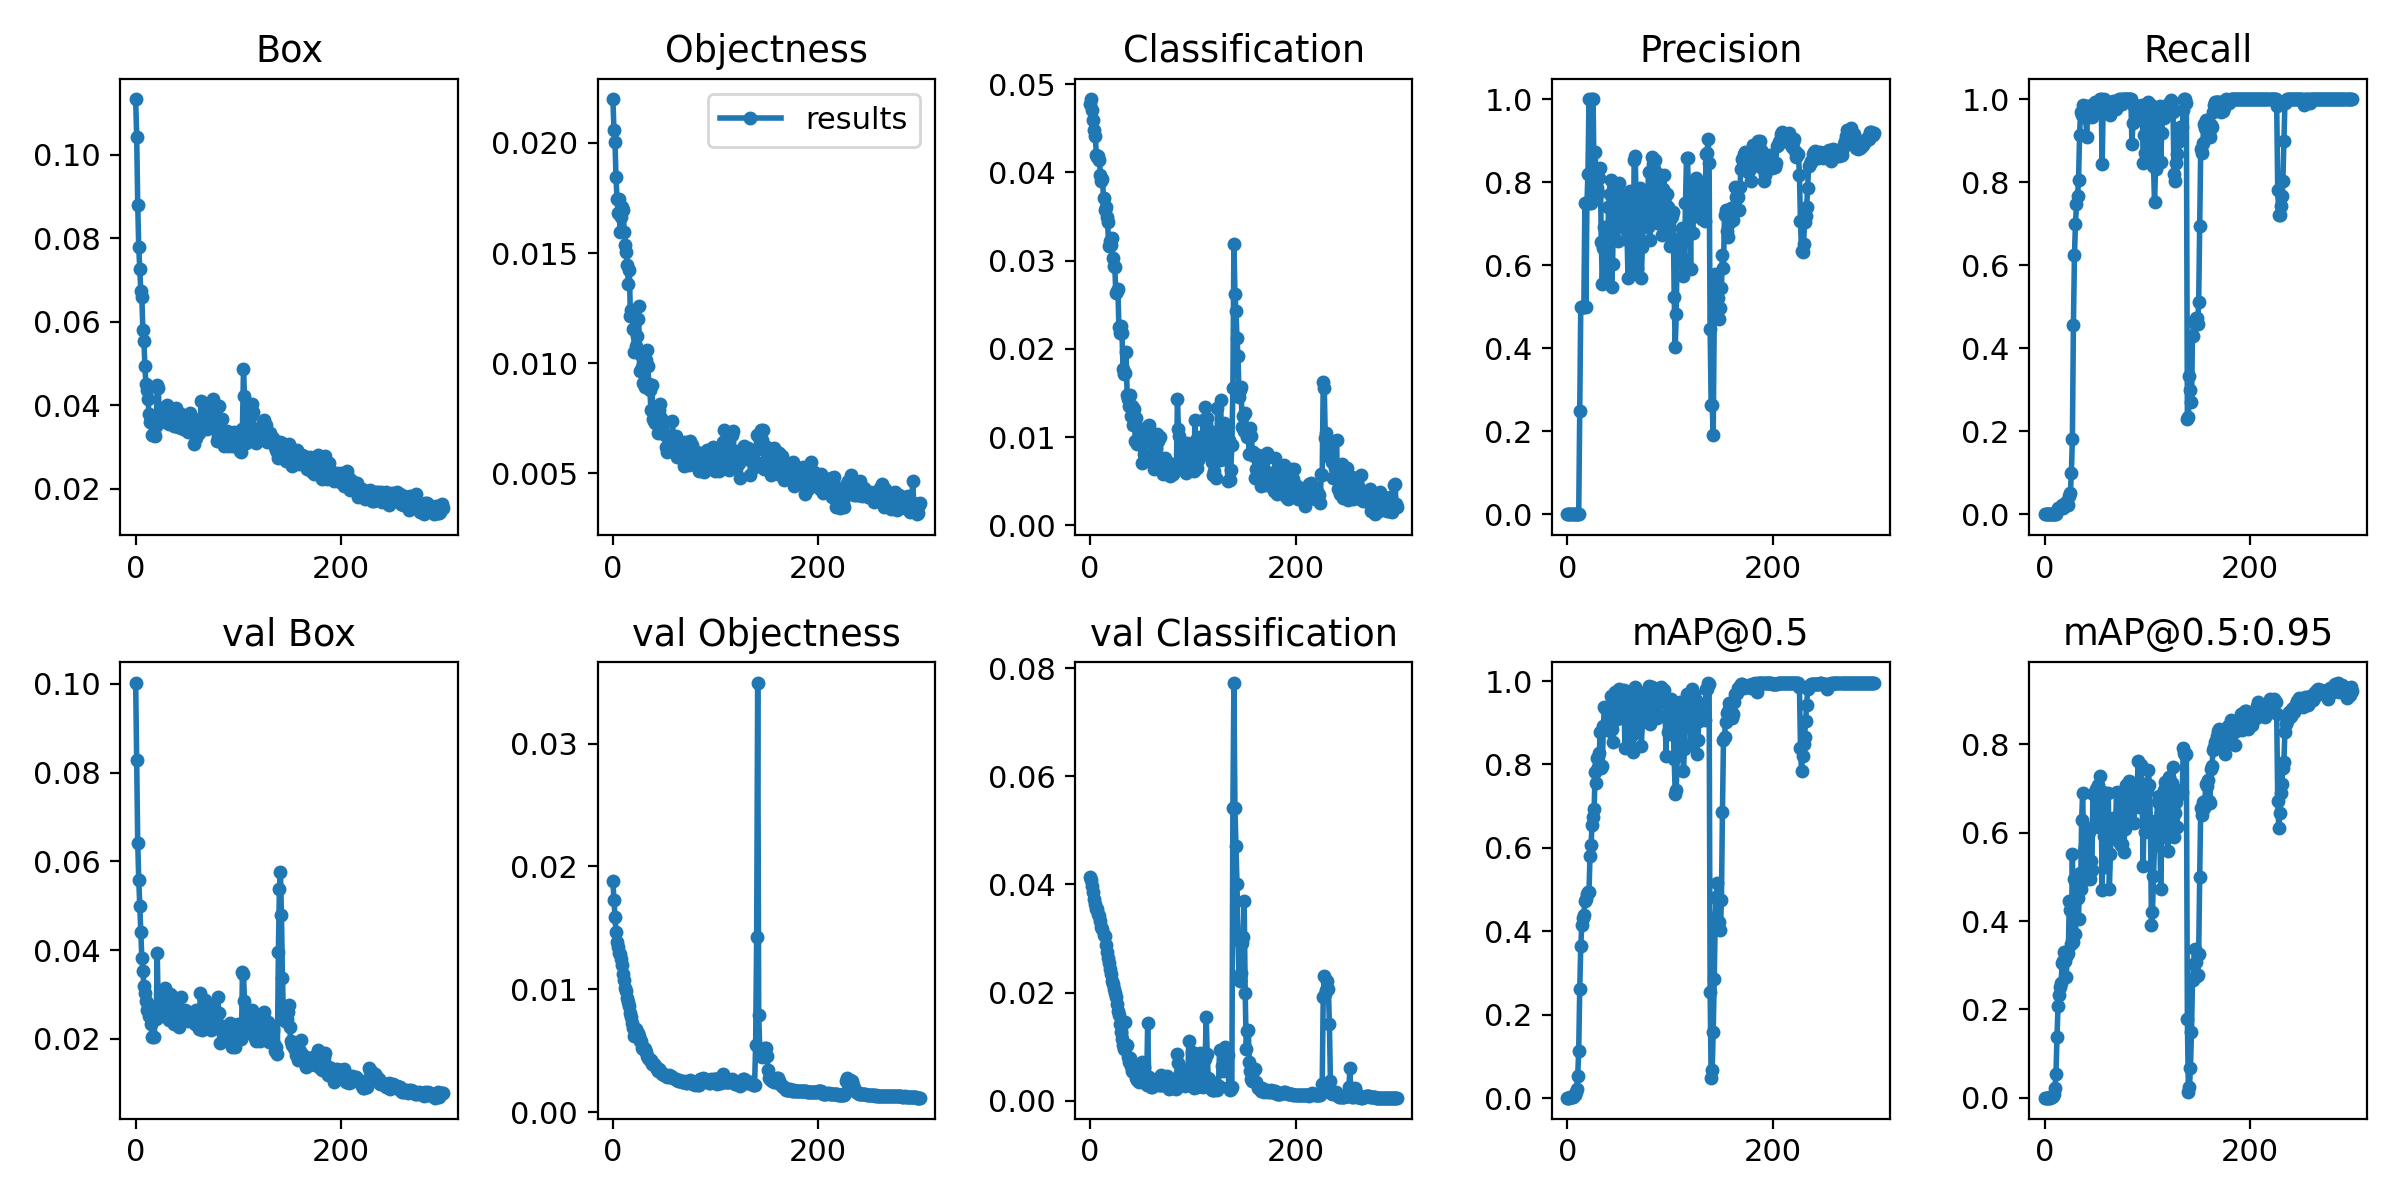
All results, by default, are logged to runs/train, with a new experiment directory created for each new training as runs/train/exp2, runs/train/exp3, etc.
Training losses and performance metrics are also logged to Tensorboard and a custom results.txt logfile.
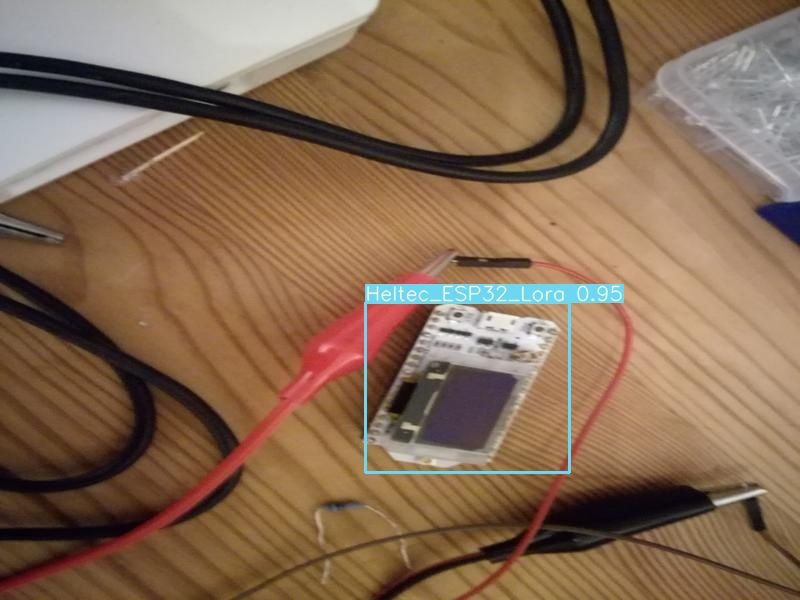
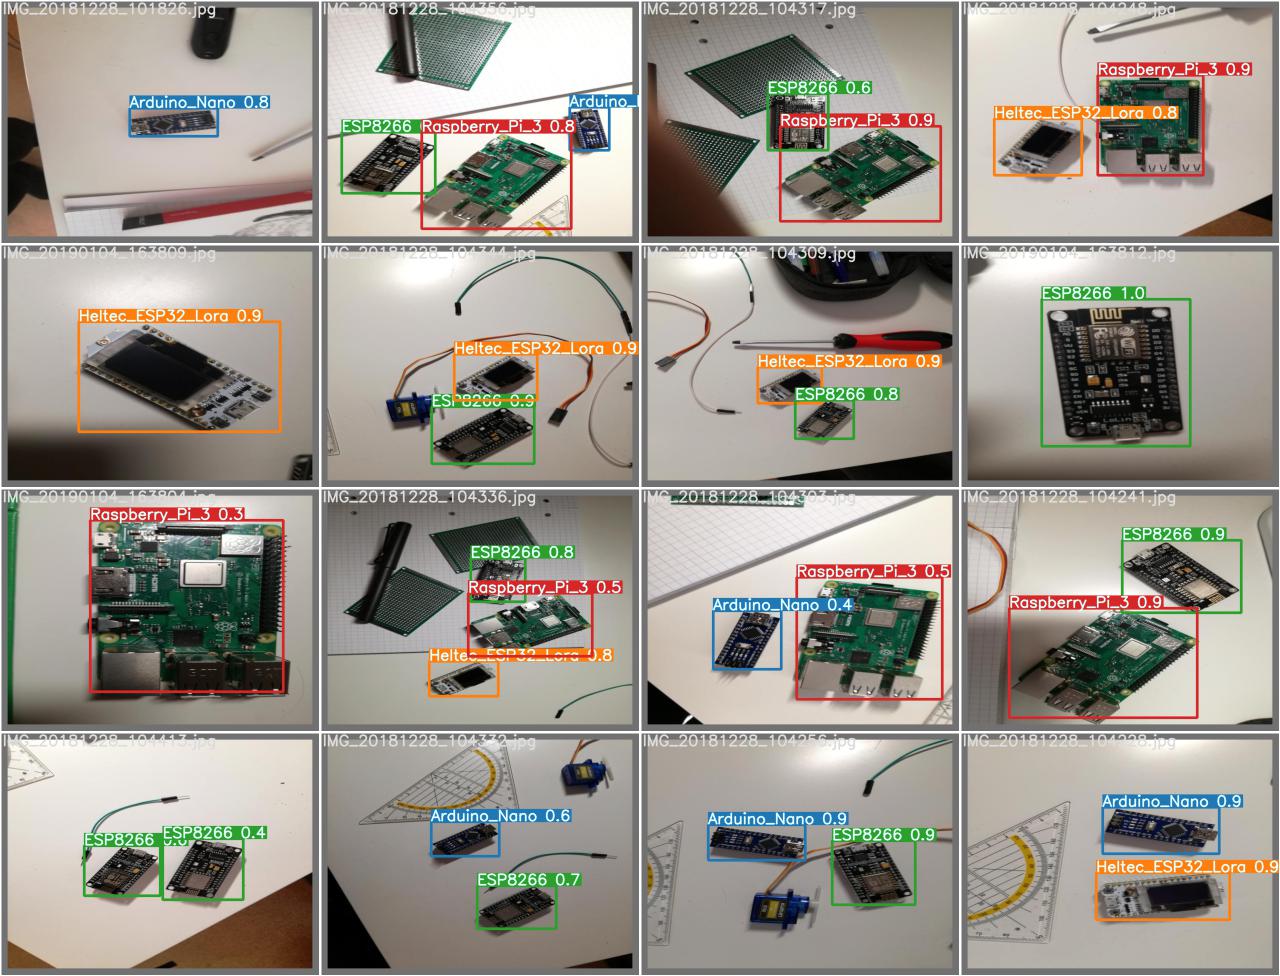
4. Make predictions with the trained model
After the training has finished, the best and latest model weights are saved. Then, they can be used to make predictions on custom images using the detect.py script.
python3 detect.py --weights runs/train/exp/weights/best.pt --img 640 --conf 0.25 --source <path to image>