This article is the first of a four-part series on object detection with YOLO. In this article, you'll get a quick overview of what YOLO is and how to use it with Darknet, an open-source neural network framework written in C and CUDA. In the following articles, you'll learn how to use YOLO with OpenCV and how to train YOLO models with Keras or PyTorch.
What is Yolo?
YOLO is one of the primary three types of object detectors you'll encounter:
- R-CNN
- SSD (Single Shot Detectors)
- YOLO (You only look once)
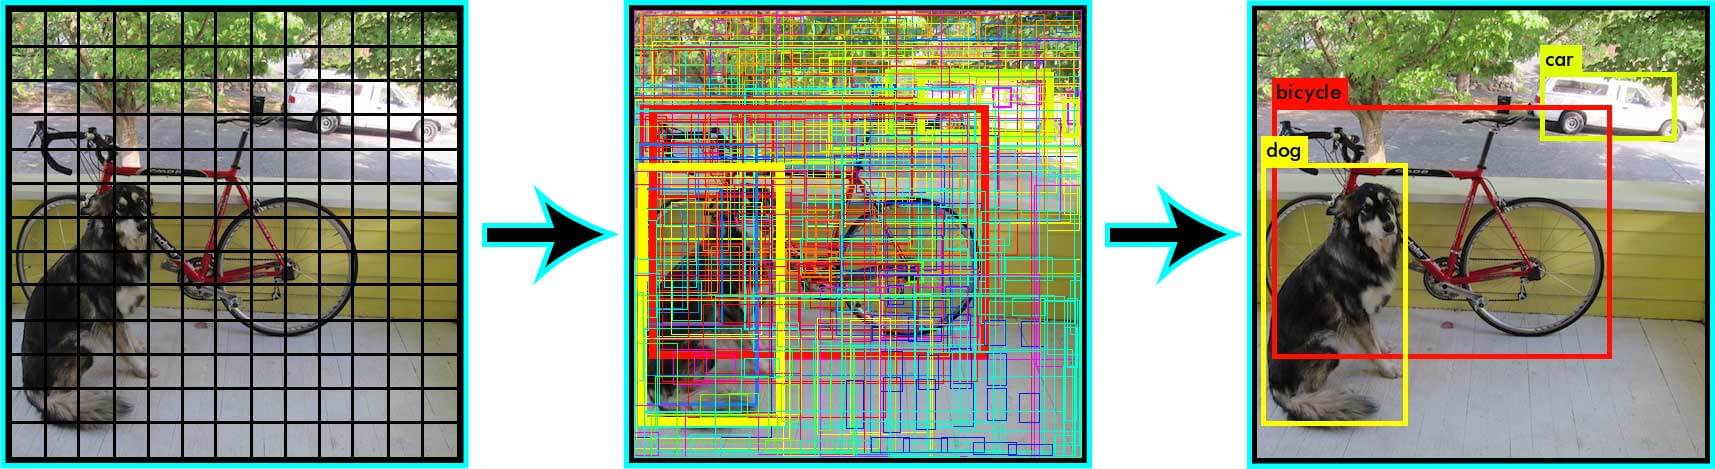
YOLO works differently than most other object detection architectures. Most methods apply the model to an image at multiple locations and scales. High scoring regions of the image are considered detections. Yolo, on the other hand, applies a single neural network to the full image. The network divides the image into regions and predicts bounding boxes and probabilities for each region. These bounding boxes are weighted by the predicted probabilities.
For more information, check out the 'You Only Look Once:Unified, Real-Time Object Detection'.
Installing Darknet
If you don't already have Darknet installed, you'll have to install it. Darknet can be installed for both CPU or GPU. You can also compile with OpenCV if you want support for more image formats.
We'll use AlexeyAB/darknet, a fork of the original darknet repository with some added features.
To install it on Linux, clone the repository, choose if you want to compile with GPU support and OpenCV, and change the Makefile accordingly. Then run make.
git clone https://github.com/AlexeyAB/darknet.git
cd darknet
// Change Makefile
make
For more information, check out the README.
Detection Using A Pre-Trained Model
To run object detection with Darknet, you need a model config and model weights. The config files can be found in the cfg subdirectory. You'll have to download the pre-trained weights:
wget https://pjreddie.com/media/files/yolov3.weights
wget https://pjreddie.com/media/files/yolov3-tiny.weights
After downloading the weights, you can run the detector on an image.
./darknet detect cfg/yolov3.cfg yolov3.weights data/dog.jpg
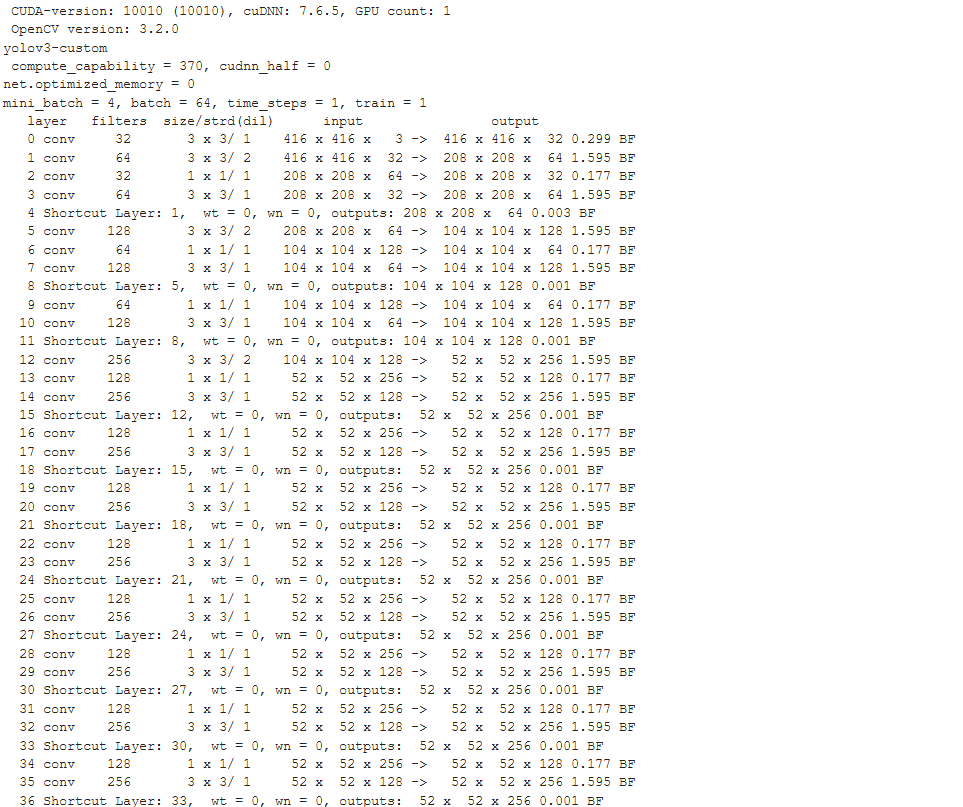
You will see an output like this:
layer filters size input output
0 conv 32 3 x 3 / 1 416 x 416 x 3 -> 416 x 416 x 32 0.299 BFLOPs
1 conv 64 3 x 3 / 2 416 x 416 x 32 -> 208 x 208 x 64 1.595 BFLOPs
.......
105 conv 255 1 x 1 / 1 52 x 52 x 256 -> 52 x 52 x 255 0.353 BFLOPs
106 detection
truth_thresh: Using default '1.000000'
Loading weights from yolov3.weights...Done!
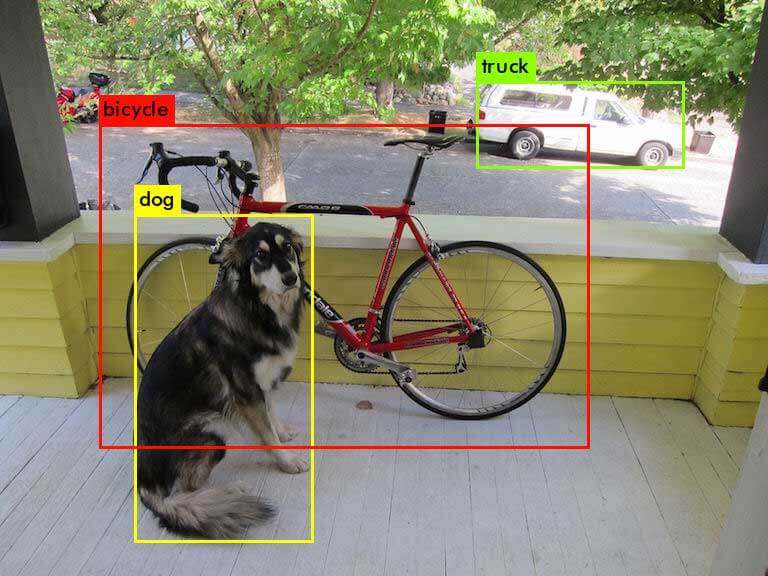
data/dog.jpg: Predicted in 0.029329 seconds.
dog: 99%
truck: 93%
bicycle: 99%
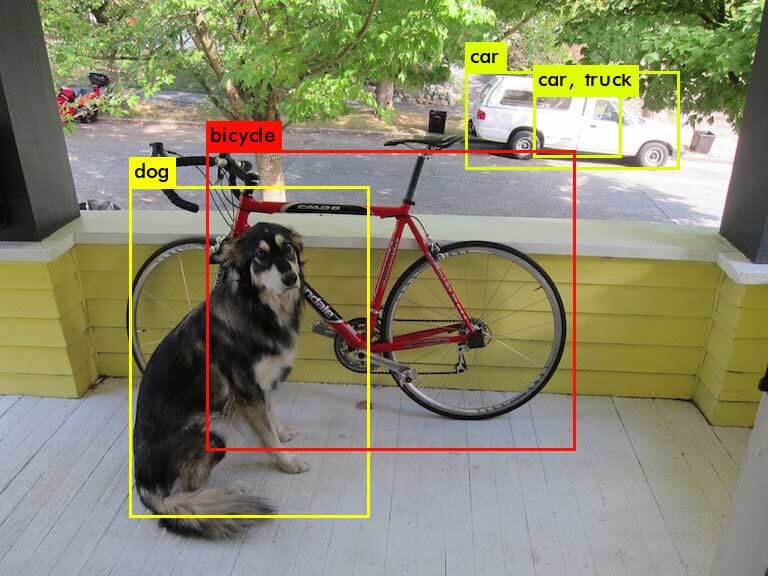
Tiny YOLO:
./darknet detect cfg/yolov3-tiny.cfg yolov3-tiny.weights data/dog.jpg
Real-Time Detection on a Webcam/video
Using Darknet, you can also run a YOLO model on a webcam or video. For this, you will need to have Darknet with CUDA and OpenCV. To run the model on the webcam, execute the following command:
./darknet detector demo cfg/coco.data cfg/yolov3.cfg yolov3.weights
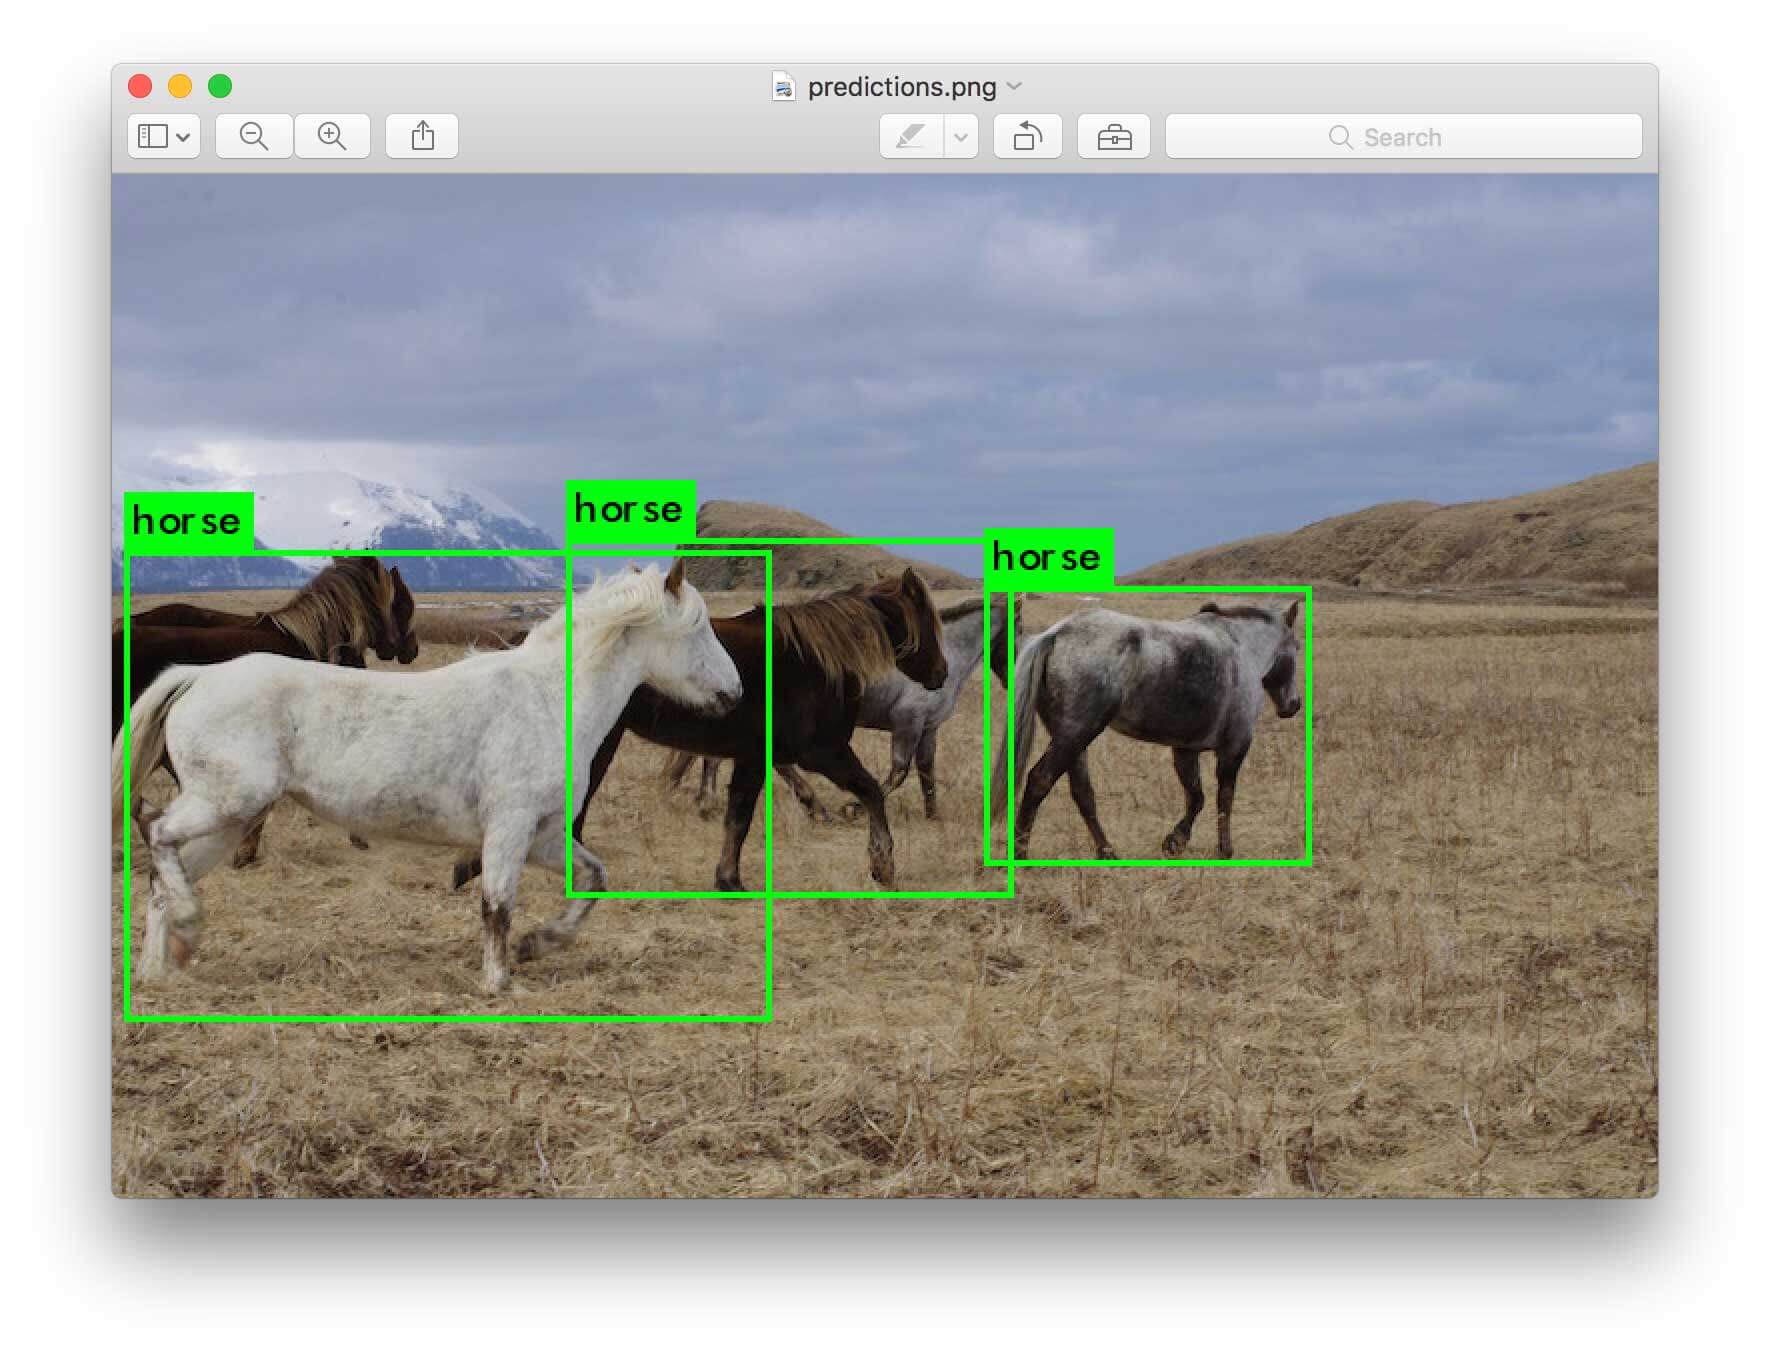
YOLO will display the current FPS and predicted classes as well as the image with bounding boxes drawn on top of it.
You can run it on a video by providing the video path at the end of the command.
./darknet detector demo cfg/coco.data cfg/yolov3.cfg yolov3.weights <video file>
YOLO Example:
wget http://www.robots.ox.ac.uk/ActiveVision/Research/Projects/2009bbenfold_headpose/Datasets/TownCentreXVID.avi

./darknet detector demo cfg/coco.data cfg/yolov3.cfg yolov3.weights TownCentreXVID.avi
TinyYOLO Example:
wget http://www.robots.ox.ac.uk/ActiveVision/Research/Projects/2009bbenfold_headpose/Datasets/TownCentreXVID.avi

./darknet detector demo cfg/coco.data fg/yolov3-tiny.cfg yolov3-tiny.weights TownCentreXVID.avi
Note: If you want to save the image you have to specifying the -out_filename argument. You can also choose not to display the video if you're, for example, connected to a remote machine by specifying -dont_show.
./darknet detector demo cfg/coco.data cfg/yolov3.cfg yolov3.weights TownCentreXVID.avi -dont_show -out_filename yolo_pedestrian_detection.avi
Training YOLO model
Darknet also allows you to train your own custom YOLO models. To do so, you need to follow the below steps:
1. Create annotations
After collecting your images, you'll have to annotate them. For YOLO, each image should have a corresponding .txt file with a line for each ground truth object in the image that looks like:
<object-class> <x> <y> <width> <height>
The .txt file should have the same name as the image and should be placed inside the same directory.
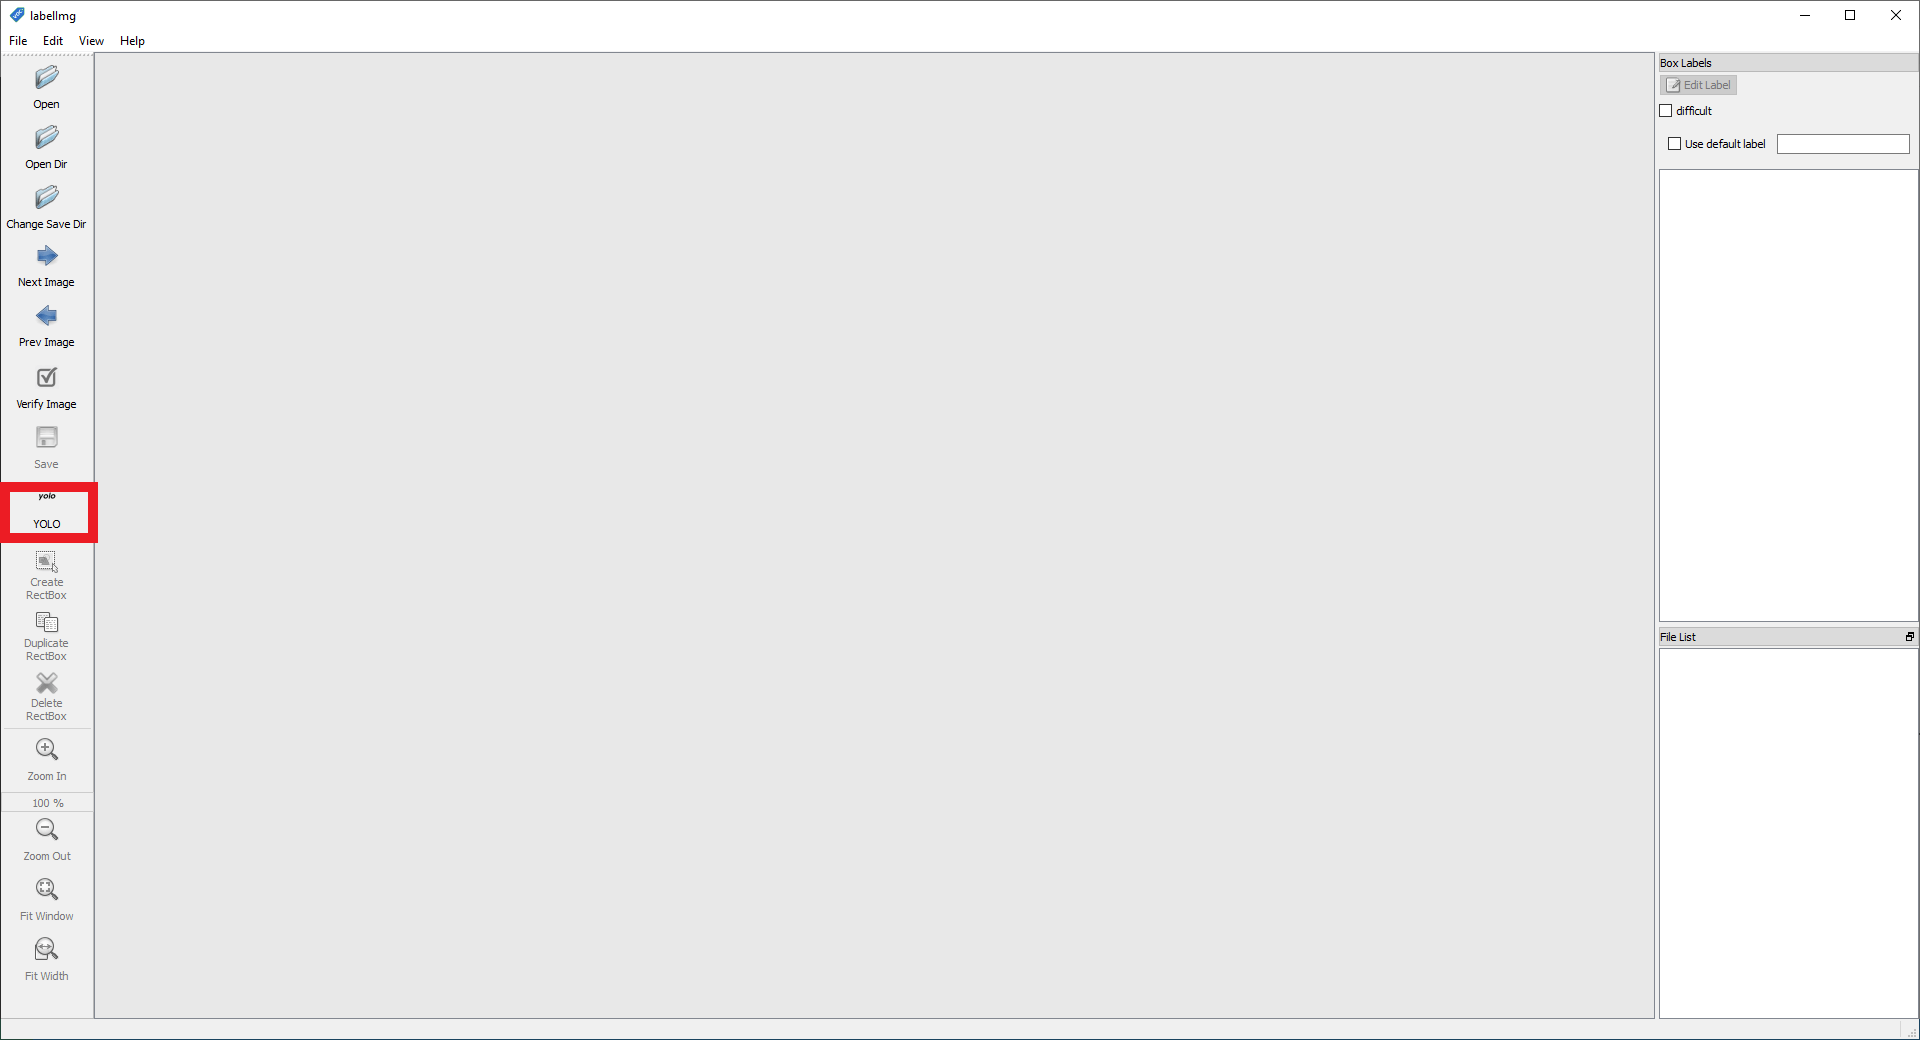
You can get such labels using an annotation tool like labelImg, which supports Pascal VOC and YOLO (ensure you have selected YOLO).
If you have a dataset with PASCAL VOC labels, you can convert them using the convert_voc_to_yolo.py script. Before you execute the file, you'll have to change the dirs and class lists to fit your dataset. After that, you can run the script:
python convert_voc_to_yolo.py
2. Create a names file
The .name file lists all the class names in your dataset. The order should match the classes list inside the convert_voc_to_yolo.py file.
Arduino_Nano
Heltec_ESP32_Lora
ESP8266
Raspberry_Pi_3
3. Create a data file
The .data file contains information regarding the training and testing set.
classes=4
train=train=microcontroller-detection/train.txt
valid=microcontroller-detection/test.txt
names=names=microcontroller-detection/custom.names
backup=backup/
4. Modify the configuration file
As a base config, we'll use the yolov3.cfg file located inside the cfg directory. You can copy the file and save it under yolov3-custom.cfg.
Inside the file, we'll make the following changes.
By default each YOLO layer has 255 outputs: 85 values per anchor [4 box coordinates + 1 object confidence + 80 class confidences], times 3 anchors. Update the settings to filters=[5 + n] * 3 and classes=n, where n is your class count. This modification should be made in all 3 YOLO layers.
5. Start training
Now that you have created all the needed files you can start the training process by typing:
wget https://pjreddie.com/media/files/darknet53.conv.74
./darknet detector train detector.data yolov3-custom.cfg darknet53.conv.74
That's all from this article. If you have any questions or want to chat with me, feel free to contact me via EMAIL or social media.