Convert your Tensorflow Object Detection model to Tensorflow Lite.

Use your Tensorflow Object Detection model on edge devices by converting them to Tensorflow Lite.
TensorFlow Lite is TensorFlow's lightweight solution for mobile and embedded devices. It allows you to run machine learning models on edge devices with low latency, eliminating the need for a server.
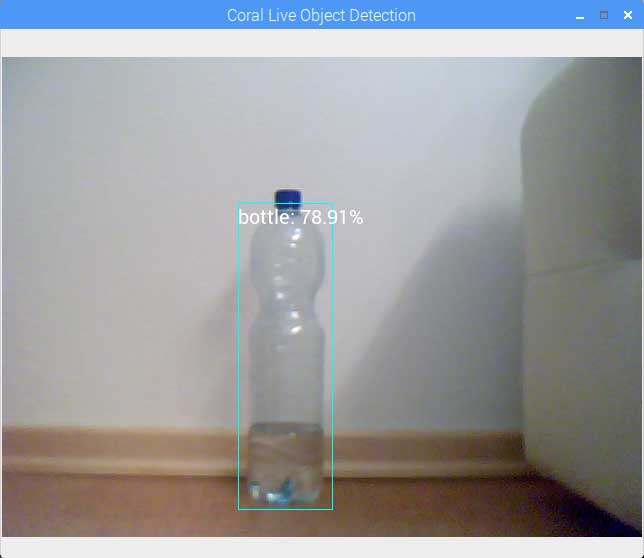
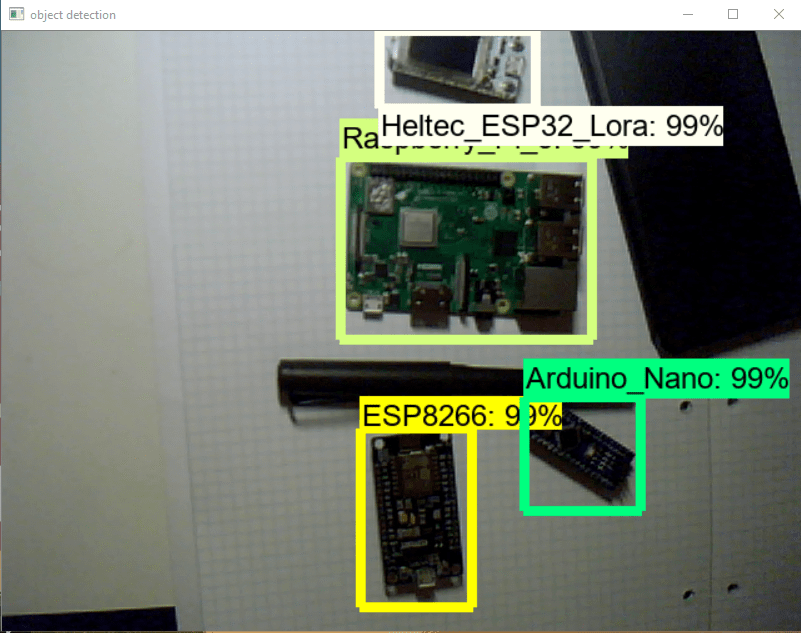
This article provides a step-by-step guide on converting a Tensorflow Object Detection model to an optimized format that can be used with Tensorflow Lite and how to run it on an edge device like the Raspberry Pi.
All the code covered in the article can be found on my Github.
1. Train an object detection model using the Tensorflow Object Detection API

For this guide, you can use a pre-trained model from the Tensorflow Model zoo or train a custom model as described in one of my other Github repositories.
Note: At this time only SSD models are supported.
2. Convert the model to Tensorflow Lite
After you have a Tensorflow Object Detection model, you can start to convert it to Tensorflow Lite.
This is a three-step process:
- Export frozen inference graph for TFLite
- Build Tensorflow from source (needed for the third step)
- Using TOCO to create an optimized TensorFlow Lite Model
2.1 Export frozen inference graph for TFLite
After training the model, you need to export the model so that the graph architecture and network operations are compatible with Tensorflow Lite. This can be done with the export_tflite_sdd_graph.py file inside the object_detection directory.
To make the following commands easier to run, let's set up some environment variables:
export CONFIG_FILE=PATH_TO_BE_CONFIGURED/pipeline.config
export CHECKPOINT_PATH=PATH_TO_BE_CONFIGURED/model.ckpt-XXXX
export OUTPUT_DIR=/tmp/tflite
on Windows, use set instead of export:
set CONFIG_FILE=PATH_TO_BE_CONFIGURED/pipeline.config
set CHECKPOINT_PATH=PATH_TO_BE_CONFIGURED/model.ckpt-XXXX
set OUTPUT_DIR=C:<path>/tflite
XXXX represents the highest number.
python export_tflite_ssd_graph.py \
    --pipeline_config_path=$CONFIG_FILE \
    --trained_checkpoint_prefix=$CHECKPOINT_PATH \
    --output_directory=$OUTPUT_DIR \
    --add_postprocessing_op=true
After executing the above command, you should see two files in the OUTPUT_DIR: tflite_graph.pb and tflite_graph.pbtxt.
2.2 Convert to TFLite
To convert the frozen graph to Tensorflow Lite, we need to run it through the Tensorflow Lite Converter. It converts the model into an optimized FlatBuffer format that runs efficiently on Tensorflow Lite.
If you want to convert a quantized model, you can run the following command:
tflite_convert \
    --input_file=$OUTPUT_DIR/tflite_graph.pb \
    --output_file=$OUTPUT_DIR/detect.tflite \
    --input_shapes=1,300,300,3 \
    --input_arrays=normalized_input_image_tensor \
    --output_arrays='TFLite_Detection_PostProcess','TFLite_Detection_PostProcess:1','TFLite_Detection_PostProcess:2','TFLite_Detection_PostProcess:3' \
    --inference_type=QUANTIZED_UINT8 \
    --mean_values=128 \
    --std_values=128 \
    --change_concat_input_ranges=false \
    --allow_custom_ops
If you are using a floating-point model, you need to change the command:
tflite_convert \
    --input_file=$OUTPUT_DIR/tflite_graph.pb \
    --output_file=$OUTPUT_DIR/detect.tflite \
    --input_shapes=1,300,300,3 \
    --input_arrays=normalized_input_image_tensor \
    --output_arrays='TFLite_Detection_PostProcess','TFLite_Detection_PostProcess:1','TFLite_Detection_PostProcess:2','TFLite_Detection_PostProcess:3' \
    --inference_type=FLOAT  \
    --allow_custom_ops
If things ran successfully, you should now see a third file in the /tmp/tflite directory called detect.tflite.
2.3 Create a new labelmap for Tensorflow Lite
Next, you need to create a label map for Tensorflow Lite since the format is different from classical TensorFlow.
Tensorflow labelmap:
item {
    name: "a"
    id: 1
    display_name: "a"
}
item {
    name: "b"
    id: 2
    display_name: "b"
}
item {
    name: "c"
    id: 3
    display_name: "c"
}
The Tensorflow Lite labelmap format only has the display_names (if there is no display_name, the name is used).
a
b
c
So basically, the only thing you need to do is create a new labelmap file and copy the display_names (names) from the other labelmap file into it.
2.4 Optional: Convert the Tensorflow Lite model so it can be used with the Google Coral EdgeTPU
If you want to use the model with a Google Coral EdgeTPU, you need to run it through the EdgeTPU Compiler.
The compiler can be installed on Linux systems (Debian 6.0 or higher) with the following commands:
curl https://packages.cloud.google.com/apt/doc/apt-key.gpg | sudo apt-key add -

echo "deb https://packages.cloud.google.com/apt coral-edgetpu-stable main" | sudo tee /etc/apt/sources.list.d/coral-edgetpu.list

sudo apt-get update

sudo apt-get install edgetpu-compiler
After installing the compiler, you can convert the model with the following command:
edgetpu_compiler --out_dir <output_directory> <path_to_tflite_file>Before using the compiler, be sure you have a model that's compatible with the Edge TPU. For compatibility details, read TensorFlow models on the Edge TPU.
3. Run the Tensorflow Lite model
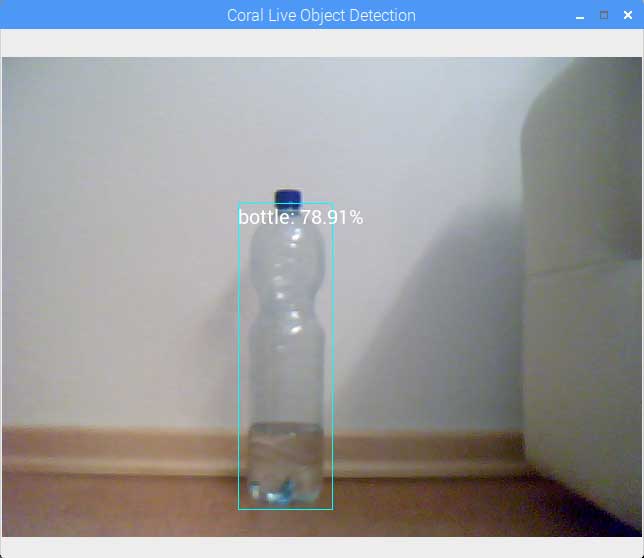
Now, you should have your model ready to go. I created two scripts that allow you to run the object detection model on a webcam or a video. If you have any questions about the code, be sure to contact me.
Run object detection on webcam:
# based on https://github.com/tensorflow/examples/blob/master/lite/examples/object_detection/raspberry_pi/detect_picamera.py
from imutils.video import VideoStream, FPS
from tflite_runtime.interpreter import Interpreter, load_delegate
import argparse
import time
import cv2
import re
from PIL import Image, ImageDraw, ImageFont
import numpy as np


def draw_image(image, results, labels, size):
    result_size = len(results)
    for idx, obj in enumerate(results):
        print(obj)
        # Prepare image for drawing
        draw = ImageDraw.Draw(image)

        # Prepare boundary box
        ymin, xmin, ymax, xmax = obj['bounding_box']
        xmin = int(xmin * size[0])
        xmax = int(xmax * size[0])
        ymin = int(ymin * size[1])
        ymax = int(ymax * size[1])

        # Draw rectangle to desired thickness
        for x in range( 0, 4 ):
            draw.rectangle((ymin, xmin, ymax, xmax), outline=(255, 255, 0))

        # Annotate image with label and confidence score
        display_str = labels[obj['class_id']] + ": " + str(round(obj['score']*100, 2)) + "%"
        draw.text((box[0], box[1]), display_str, font=ImageFont.truetype("/usr/share/fonts/truetype/piboto/Piboto-Regular.ttf", 20))

        displayImage = np.asarray( image )
        cv2.imshow('Coral Live Object Detection', displayImage)


def load_labels(path):
    """Loads the labels file. Supports files with or without index numbers."""
    with open(path, 'r', encoding='utf-8') as f:
        lines = f.readlines()
        labels = {}
        for row_number, content in enumerate(lines):
            pair = re.split(r'[:\s]+', content.strip(), maxsplit=1)
            if len(pair) == 2 and pair[0].strip().isdigit():
                labels[int(pair[0])] = pair[1].strip()
            else:
                labels[row_number] = pair[0].strip()
    return labels


def set_input_tensor(interpreter, image):
    """Sets the input tensor."""
    tensor_index = interpreter.get_input_details()[0]['index']
    input_tensor = interpreter.tensor(tensor_index)()[0]
    input_tensor[:, :] = image


def get_output_tensor(interpreter, index):
    """Returns the output tensor at the given index."""
    output_details = interpreter.get_output_details()[index]
    tensor = np.squeeze(interpreter.get_tensor(output_details['index']))
    return tensor


def detect_objects(interpreter, image, threshold):
    """Returns a list of detection results, each a dictionary of object info."""
    set_input_tensor(interpreter, image)
    interpreter.invoke()

    # Get all output details
    boxes = get_output_tensor(interpreter, 0)
    classes = get_output_tensor(interpreter, 1)
    scores = get_output_tensor(interpreter, 2)
    count = int(get_output_tensor(interpreter, 3))

    results = []
    for i in range(count):
        if scores[i] >= threshold:
            result = {
                'bounding_box': boxes[i],
                'class_id': classes[i],
                'score': scores[i]
            }
            results.append(result)
    return results


def make_interpreter(model_file, use_edgetpu):
    model_file, *device = model_file.split('@')
    if use_edgetpu:
        return Interpreter(
            model_path=model_file,
            experimental_delegates=[
                load_delegate('libedgetpu.so.1',
                {'device': device[0]} if device else {})
            ]
        )
    else:
        return Interpreter(model_path=model_file)


def main():
    parser = argparse.ArgumentParser(formatter_class=argparse.ArgumentDefaultsHelpFormatter)
    parser.add_argument('-m', '--model', type=str, required=True, help='File path of .tflite file.')
    parser.add_argument('-l', '--labels', type=str, required=True, help='File path of labels file.')
    parser.add_argument('-t', '--threshold', type=float, default=0.4, required=False, help='Score threshold for detected objects.')
    parser.add_argument('-p', '--picamera', action='store_true', default=False, help='Use PiCamera for image capture')
    parser.add_argument('-e', '--use_edgetpu', action='store_true', default=False, help='Use EdgeTPU')
    args = parser.parse_args()

    labels = load_labels(args.labels)
    interpreter = make_interpreter(args.model, args.use_edgetpu)
    interpreter.allocate_tensors()
    _, input_height, input_width, _ = interpreter.get_input_details()[0]['shape']

    # Initialize video stream
    vs = VideoStream(usePiCamera=args.picamera, resolution=(640, 480)).start()
    time.sleep(1)

    fps = FPS().start()

    while True:
        try:
            # Read frame from video
            screenshot = vs.read()
            image = Image.fromarray(screenshot)
            image_pred = image.resize((input_width ,input_height), Image.ANTIALIAS)

            # Perform inference
            results = detect_objects(interpreter, image_pred, args.threshold)

            draw_image(image, results, labels, image.size)

            if( cv2.waitKey( 5 ) & 0xFF == ord( 'q' ) ):
                fps.stop()
                break

            fps.update()
        except KeyboardInterrupt:
            fps.stop()
            break

    print("Elapsed time: " + str(fps.elapsed()))
    print("Approx FPS: :" + str(fps.fps()))

    cv2.destroyAllWindows()
    vs.stop()
    time.sleep(2)


if __name__ == '__main__':
    main()
You can also find the code on my Github.
Conclusion
Using the Tensorflow Object Detection API, you can create object detection models that runs on many platforms, including desktops, mobile phones, and edge devices. For running models on edge devices and mobile phones, converting the model to Tensorflow Lite is recommended.
That's all from this article. If you have any questions or want to chat with me, feel free to contact me via EMAIL or social media.